logo

How to Use Pixverse AI: A Step-by-Step Guide

By Avis Redford|Updated on Mar 24, 2025

How to Use Pixverse AI

Creating videos used to be complicated. You needed expensive equipment, advanced editing skills, and hours of time. But with Pixverse AI , video production has been completely redefined. This innovative AI-powered video generator lets anyone create stunning videos—even if you lack technical skills.


Whether you're a total beginner or a seasoned creator, this guide will walk you through everything you need to know about how to use Pixverse AI. From setting up an account to mastering advanced features, we’ve got you covered.


Getting Started with Pixverse AI

Create Your Pixverse Account

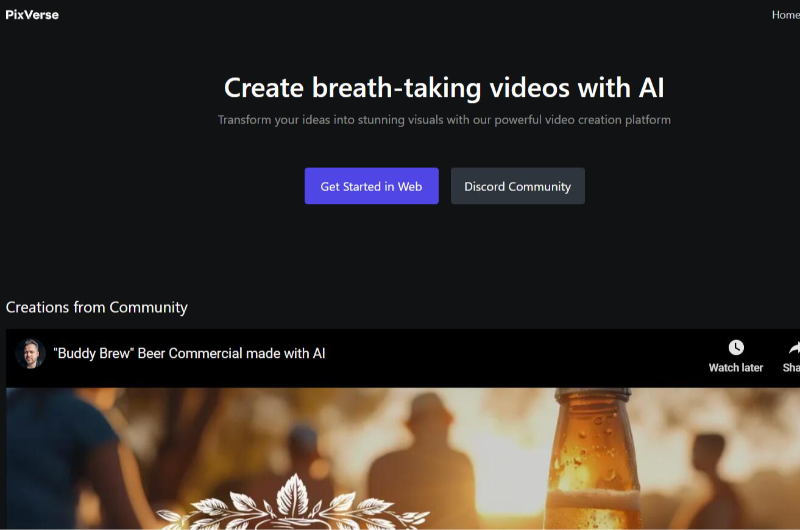
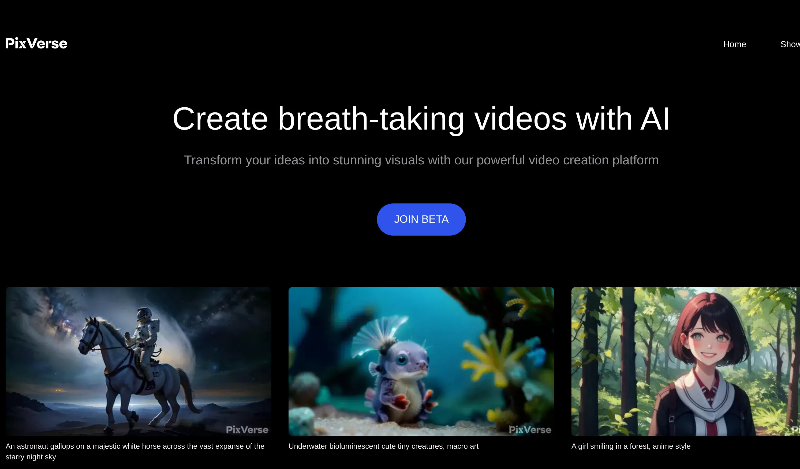
Are you ready to create stunning AI-generated videos? Fantastic! We’ll take you through everything step-by-step on how to use Pixverse AI, so you’ll be up and running in no time. From setting up your account to exploring features, we’ve got you covered.


Step 1: Create Your Pixverse Account

To start your AI video-making adventure, you’ll need to create an account. Here’s how you can do it:

  • Visit the Pixverse Website: Open your favorite browser and go to the Pixverse website. The homepage will welcome you with helpful prompts.
  • Click "Sign Up": Look for the "Sign Up" button, usually at the top of the page. Click on it to begin the registration process.
  • Fill in Your Details:
    • Provide your name, email address, and create a secure password.
    • Some sign-up forms might allow you to log in using Google or other accounts. This can save time if you prefer.
  • Pick a Plan:
    • Pixverse offers various subscription plans. Take a moment to review them and choose the one that suits your needs.
    • Look out for free trials or limited-time offers; these can be great for getting started without committing right away.
  • Confirm Your Email: After signing up, you’ll likely receive a confirmation email. Open it and click the link provided to verify your account.


That’s it! Your Pixverse account is now ready to go.


Step 2: Explore the Dashboard

Once you log in, you're greeted by the Pixverse dashboard. Think of it as your creative station where all the magic happens. Here’s what you can do from the dashboard:


Navigate the Features

  • Video Creation Tool: This is where you’ll start crafting your AI-powered videos.
  • Templates Library: Explore a wide variety of pre-made video templates. These are especially handy if you want to save time or need some inspiration.
  • Settings Tab: Whether you need to update your profile, manage your subscription, or adjust app preferences, you’ll find it all here.


Tips for First-Time Exploration

  • Take a moment to hover over icons or buttons for helpful tooltips.
  • Check out the tutorials or guided tours (if available) on the dashboard. These can explain features in more detail.
  • If you get stuck, look for the help or support button for additional resources.


Step 3: Understand Video Settings

Now, before you jump straight into creating, it’s crucial to understand the key video settings. These settings help Pixverse understand your vision and bring it to life.


Aspect Ratio

  • The aspect ratio determines the frame shape of your video.
  • Common options include square (1:1) for social media, vertical (9:16) for stories or reels, and horizontal (16:9) for YouTube or presentations.
  • Think about where you’ll share your video, then select the appropriate size.


Style Selection

  • Pixverse offers tons of styles to match your preferences.
  • You can choose between realistic, cartoony, cinematic, futuristic, and more!
  • Play around with the preview options to see what suits your vision.


The “Seed” Explained

  • The “seed” is like a randomizer that influences the final output of your video. It helps add variety and uniqueness.
  • Think of it as a creative tweak; if you don’t like how one version turns out, adjusting the seed can give you a completely different look!


Pro Tip: Don’t be afraid to experiment. Some of the best results come from trying a mix of settings.


With your account set up, dashboard explored, and video settings understood, you’re all set to make your first AI-generated video.

Also Read: How to Use Kling AI to Create Stunning Videos? >>


Creating Your First Video

Creating Your First Pixverse Video

Are you ready to bring your creativity to life? Creating your first AI-generated video in Pixverse is an exciting and straightforward process.


Option 1: Text-to-Video

The Text-to-Video feature is the simplest way to get started. It’s like typing your imagination into magic and watching it come alive.


Open the Video Creation Tool

  • Go to the Pixverse dashboard and click on the “Create Video” option. From there, select the Text-to-Video feature.

Enter Your Video Description:

  • You’ll see a text box where you can describe the video you want.
  • Be specific! For example, instead of writing “a dog,” you could write “a golden retriever wearing sunglasses and dancing under disco lights.”
  • Use clear and creative phrases to help the AI generate a video that matches your vision.

Adjust Basic Settings:

  • Choose the aspect ratio that fits your needs (square, vertical, or horizontal).
  • Pick a style for the video, like realistic, cinematic, or cartoony.

Hit Generate

  • Once you’ve entered all your preferences, click the Generate button.
  • Sit back for a few moments while Pixverse works its magic!


Preview and Refine

  • You’ll get a preview of the AI-generated video. If it’s not quite right, go back and tweak your text or adjust the settings.
  • Once you’re happy, save your video or export it to share with the world!


Pro Tip: Short, vivid descriptions often work best. Don’t overcrowd your text, but don’t leave out key details either.


Option 2: Image-to-Video

Pixverse AI Image-to-Video

Have a photo you love? With Image-to-Video, Pixverse can animate it, turning a static image into a lively, engaging clip.


Upload Your Image

  • Click on the Image-to-Video option in the Video Creation Tool.
  • Choose an image from your device and upload it. High-quality photos often create better results, so pick one you’re proud of!


Add Animation Effects

  • Once your image is uploaded, Pixverse will offer animation options.
  • Select effects like movement, lighting, transitions, or quirky add-ons like flying sparkles or floating elements. Get creative!


Enhance the Scene

  • You can enrich your video by adding backgrounds, props, or elements that enhance your image. For example, if your photo is of a flower, you could add a fluttering butterfly or a glowing sunbeam.
  • Use the style selector to make it look dreamy, painterly, or even futuristic.


Preview Your Animation

  • Watch a preview to see the magic unfold. Make changes as needed to match your vision.


Finalize and Save

  • Once everything looks great, save your video and share it on social media, presentations, or wherever you want.


Pro Tip: Experiment with different effects to give life to even the simplest pictures. It’s all about creativity!


Option 3: Character-to-Video

Pixverse AI Character-to-Video

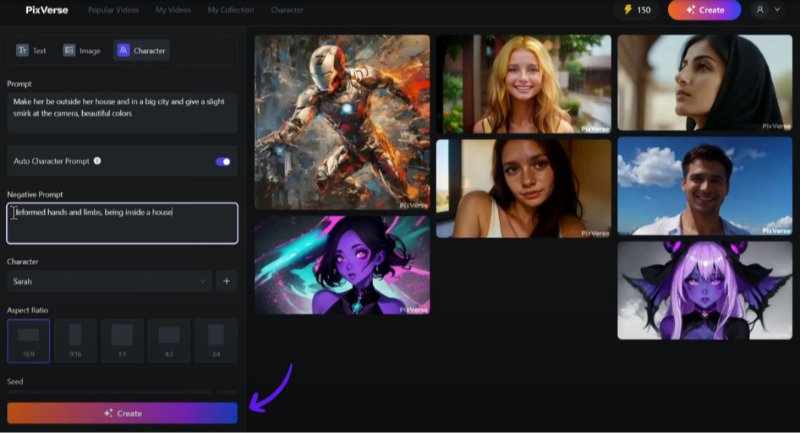
This feature is for the dreamers who want to bring their unique characters to life. You’re not just creating a video; you’re directing your own mini movie!


Create Your Character

  • Select the Character-to-Video option within the Video Creation Tool.
  • You’ll be taken to a character design interface. Here, you can customize the appearance of your character.
    • Adjust features like hairstyle, clothing, facial details, and more.
    • Choose the overall vibe of your character, such as heroic, quirky, futuristic, or animated.


Define Your Character’s Actions

  • Next, decide what your character will do. For example:
    • Will they dance, speak, or simply explore a cool environment?
    • Add dialogue if you want your character to talk, and Pixverse will generate the voice!
  • If your character is interacting with others or moving through a scene, use the storyboard feature to map this out.


Choose the Scene and Style

  • Select a setting for your character’s adventure. Whether it’s a busy marketplace, a starry galaxy, or a serene forest, Pixverse provides stunning environments to choose from.
  • Pick a video style that complements your scene, like cartoony for fun videos or realistic for dramatic ones.


Generate the Video

  • Once your character, settings, and actions are all set, hit Generate.
  • Watch as your custom creation transforms into a mini film starring your own character!


Edit and Polish

  • You’ll get a chance to preview the video. Make edits to fine-tune actions, dialogue, or the environment before finalizing it.


Save and Share Your Masterpiece

  • Save your video to your device or share it directly online. You just created a unique character-driven story!


Pro Tip: Use this feature to design characters that represent your brand, personality, or story ideas. It’s a powerful tool for creating memorable content!


With Pixverse’s Text-to-Video, Image-to-Video, and Character-to-Video features, the possibilities are endless. Whether you’re learning how to use Pixverse AI to bring a wild idea to life, animating a treasured photo, or crafting an epic tale with your custom characters, you now have all the tools you need to create stunning videos.

Also Read: How to Use Pictory AI >>


Tips for Creating Stunning Videos

Want to level up your video-making game? Here are some handy tips to help you get the most out of your creative process. Whether you’re exploring how to use Pixverse AI or fine-tuning your skills, these tips will set you on the right path!


1. Experiment with Settings

Those video settings we discussed earlier? Don’t hold back! Play around with them to discover unique combinations. Try different styles like cinematic, cartoony, or futuristic. Adjust aspect ratios to fit the platform you’re targeting, and have fun exploring seeds to add a personal touch to your videos.


2. Start Simple

If you’re just getting started with AI video creation, keep your first projects simple. For example, instead of going all out with complex scenes, stick with straightforward ideas like animating one character or creating a basic story. Once you’re confident with how to use Pixverse AI, you can start tackling more ambitious and intricate projects.


3. Focus on Fun

Video creation is meant to be an enjoyable experience. Don’t stress over perfection in the beginning! With Pixverse’s intuitive tools, it’s all about testing the waters and having fun.


4. Keep Practicing

Mastering how to use Pixverse AI takes time, but with practice, you’ll soon be making videos that stand out! Watch tutorials, explore advanced features, and analyze what works best for your creative goals.


5. Dream Big

Who knows? That unique video you create today might go viral tomorrow! Whether it’s for social media, a YouTube channel, or personal projects, the possibilities are endless.


Remember, the key to great videos is consistent experimentation and learning. Don’t hesitate to try new things and push your creative boundaries.


Enhancing Your Videos

Pixverse AI Enhancing Your Videos

Congratulations on creating your first video with Pixverse! It’s like baking a delicious cupcake—but now it’s time to add the frosting and sprinkles that’ll make it truly standout. Here’s how you can take your videos to the next level while figuring out how to use Pixverse AI.


Use Editing Tools to Polish Your Video

Pixverse provides a suite of built-in editing tools to turn your raw creation into a masterpiece. Think of these tools as your personal mini-movie studio.

  • Trim and Cut Unnecessary Parts: Did the AI generate a scene that’s too long or doesn’t quite fit? No problem! Use the editing tool to cut out clips you don’t need.
  • Zoom for More Impact: Highlight important moments by adding zoom-ins for dramatic effect or zoom-outs for a cinematic touch.
  • Add Sound Effects and Music: Bring your video to life with sound! Whether it’s a calm soundtrack, upbeat background music, or sound effects like footsteps or applause, Pixverse has options to suit any style. Want a cat video with meows timed just right? Easy!


Customize Your Video with Unique Styles

Pixverse makes customization seamless, which helps your creations stand out. Whether you’re aiming for a quirky cartoon vibe or an epic sci-fi adventure, the sky’s the limit.

  • Change Colors: Adjust the color palette to fit your mood. You can go vibrant and exciting for upbeat content or darker and muted for intense scenes.
  • Add Special Effects: Want glowing stars, dramatic shadows, or laser beams? Pixverse has options to tailor effects for your narrative.
  • Create a Period Feel: Take your video back in time with a vintage film grain effect or fast-forward to the future with neon-lit aesthetics.


Experiment with Advanced Features

The more you explore using Pixverse AI, the more exciting possibilities you’ll uncover. Advanced features allow you to create next-level content that wows your audience.

  • Animate Objects with Movement: Use Pixverse’s motion tools to make characters or objects move in incredible ways, such as swirling through air or performing complex actions like flipping.
  • Make Objects Vanish or Appear: Want a magical effect? Create scenes where objects fade or transport in and out of view. Perfect for creative projects like a magician pulling a rabbit out of thin air!
  • Add Dynamic Backgrounds: Imagine yourself in front of a sprawling galaxy, a mystical jungle, or even standing on the surface of Mars. Dynamic backgrounds elevate your settings and immerse viewers.


Wrapping Up

Wow, we’ve covered so much ground! From mastering how to use Pixverse AI to bring your ideas to life, to creating incredible videos that turn words into animations and pictures into dynamic scenes, you’re now equipped with the tools to transform your imagination into reality.


We also explored handy tips for enhancing your creations, from tweaking settings to making videos that truly shine. Pixverse isn’t just a platform; it’s like unlocking a creative superpower. Whether you want to make hilarious clips for your friends, craft school projects that amaze your teachers, or even experiment with new content ideas, Pixverse has your back.


FAQs About Pixverse AI


1. Is Pixverse free to use?

Yes! Pixverse offers plans for all budgets, including a free trial to test its features.


2. How long does it take to create a video?

Depending on complexity, Pixverse generates videos in minutes. Perfect for those on tight schedules.


3. What devices does Pixverse support?

Pixverse works on desktops, tablets, and smartphones—create anywhere, anytime.


4. Can I edit a video after it’s generated?

Absolutely. Pixverse’s editing tools make it easy to tweak and perfect your videos post-generation.


5. Need more help?

Join Pixverse's friendly Discord server to chat with other creators, share tips, and explore new ideas.

You May Also Like